Complete the following steps to configure the TicketSocket interface in Idealpos.
The TicketSocket Interface will need to be enabled in the Licence Gateway.
Contact our sales team for further details about enabling this interface in your Licence Gateway.
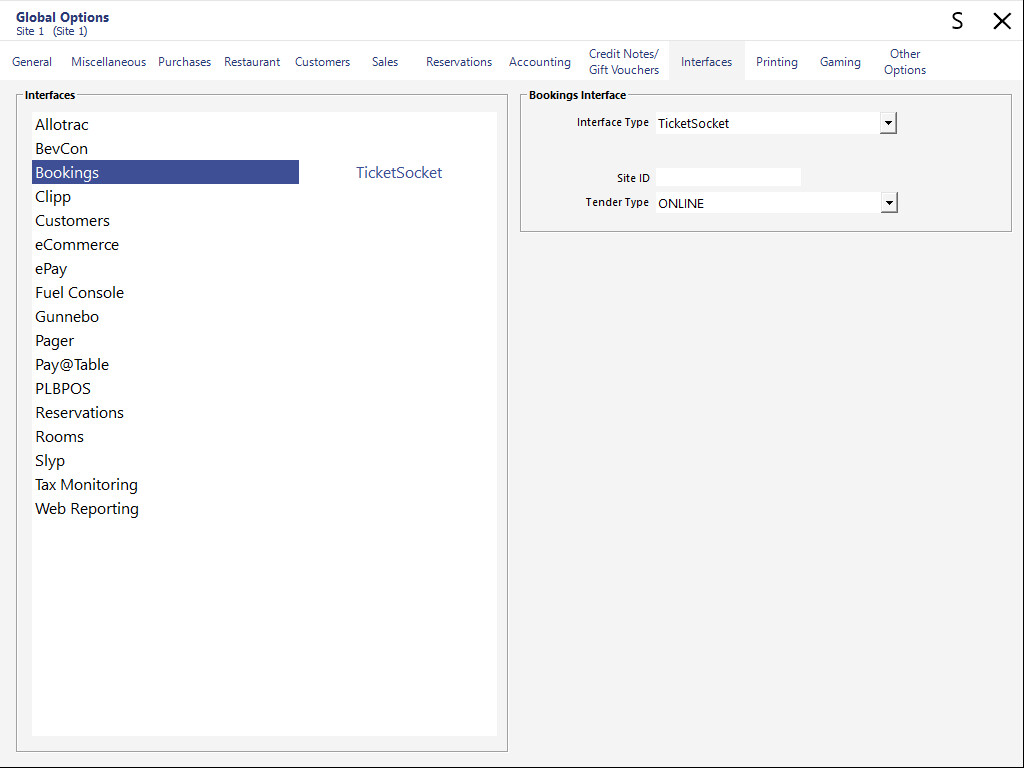
The TicketSocket Interface, Site ID and Tender Type will need to be selected/entered.
Go to: Back Office > Setup > Global Options > Interfaces > Bookings
Interface Type: TicketSocket
Site ID: Enter the Site ID supplied by TicketSocket
Tender Type: ONLINE (or select the Tender Type that will be used by TicketSocket - Tender Types can be configured via Back Office > Setup > Function Descriptors)
The TicketSocketClientId, TicketSocketUsername, TicketSocketPassword need to be added to the ips.exe.config.
The folder location which the ips.exe.config file is stored in depends on the Operating System architecture (32 BIT or 64 BIT).
64 BIT Operating System - "C:\Program Files (x86)\Idealpos Solutions\Idealpos\ips.exe.config"
32 BIT Operating System - "C:\Program Files\Idealpos Solutions\Idealpos\ips.exe.config"
Add the following to the ips.exe.config, replacing the values with those supplied by TicketSocket.
<configuration>
<startup useLegacyV2RuntimeActivationPolicy="true">
<supportedRuntime version="v4.0"/>
</startup>
<appSettings>
<add key="TicketSocketClientId" value="EnterClientIdHere" />
<add key="TicketSocketUsername" value="EnterUsernameHere" />
<add key="TicketSocketPassword" value="EnterPasswordHere" />
</appSettings>
</configuration>
The Ticket button will be used to sell TicketSocket tickets.
Go to: Back Office > Setup > POS Screen > POS Screen Setup > Select a POS Screen Layout > Buttons.
Select the desired POS Screen tab, then locate a blank button on the desired tab and configure as follows:
Function: Ticket [Note that this 'Ticket' function will only appear after the TicketSocket Interface has been selected as the Bookings Interface in Global Options]
Button Caption: Ticket [or enter the desired Button Caption]
Button Appearance: Customise as required.

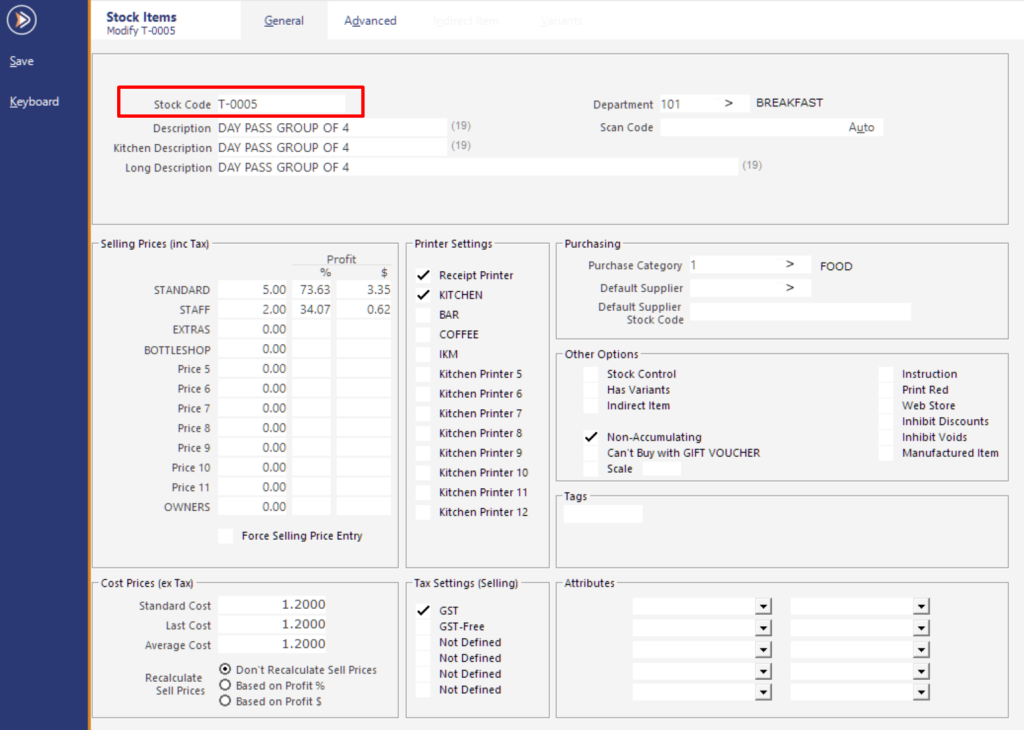
The Ticket's 'Short Description' field in TicketSocket will be linked to the Idealpos Stock Item Code.
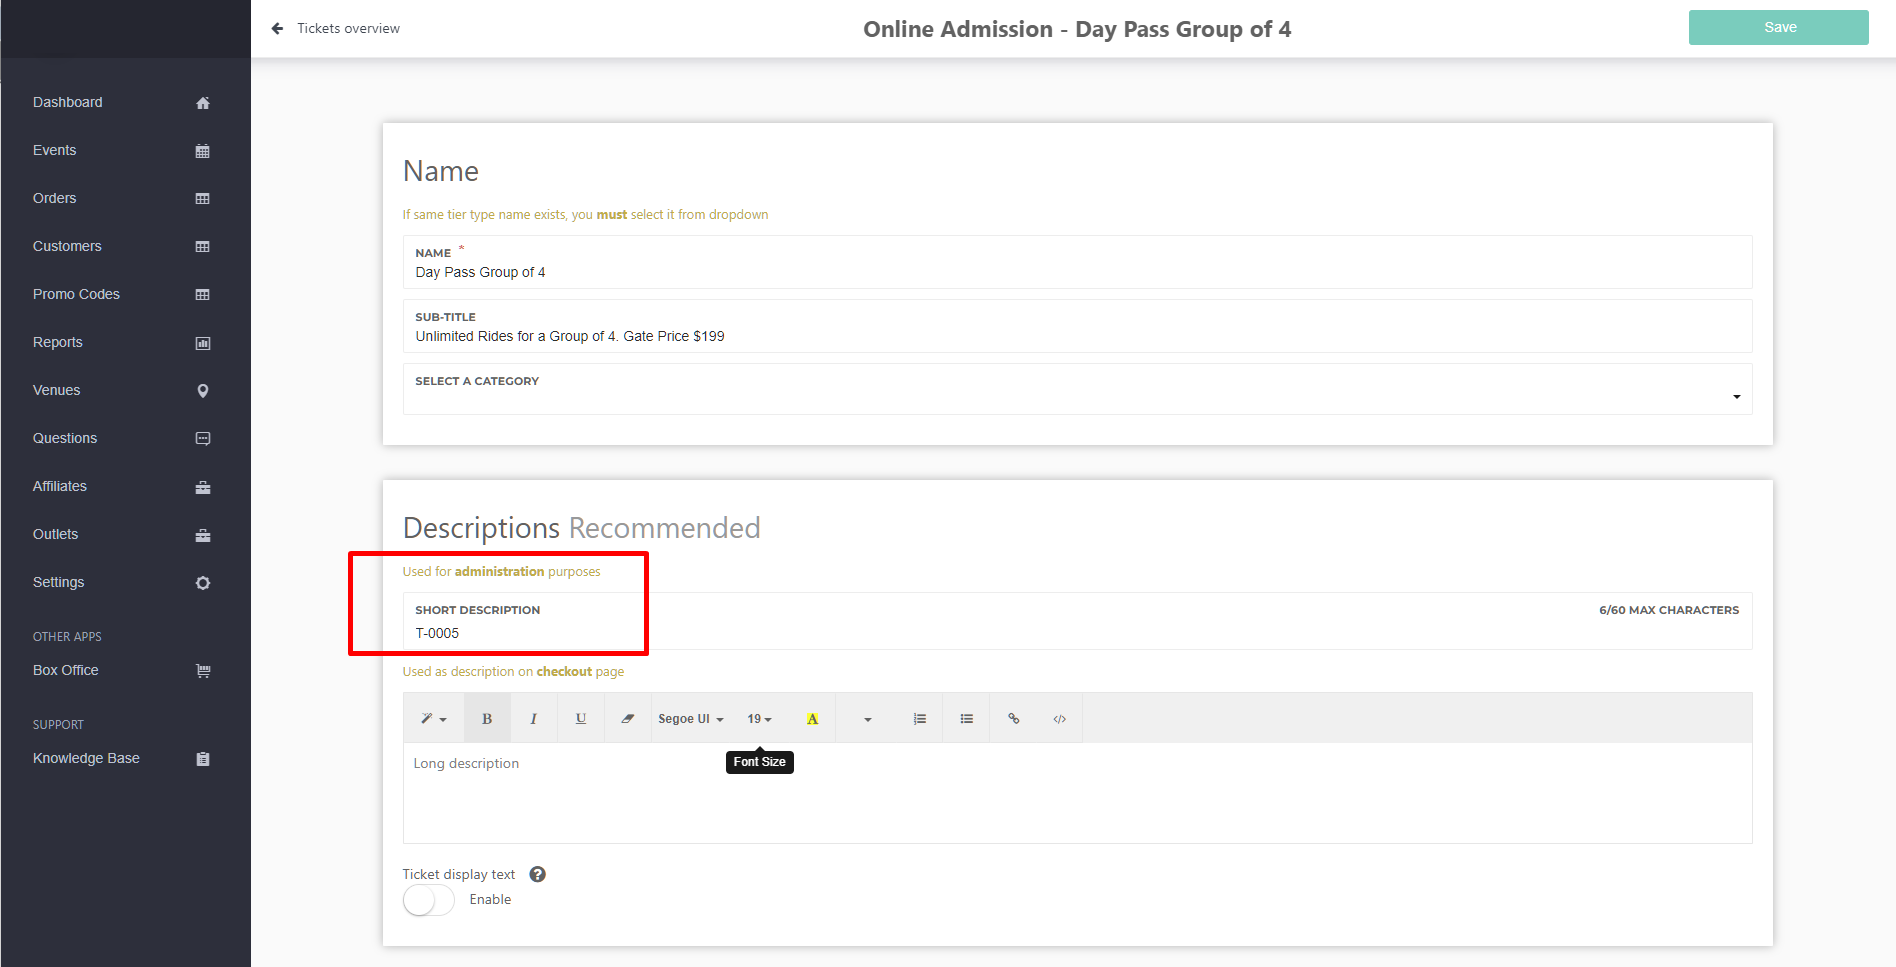
Create the Stock Item in Idealpos as required so that Stock Item Code matches the Ticket's 'Short Description'.